A tale of two extraordinary lives filled with children, craft and laughter


Saturday 31 December 2011

And then there were two...(pairs)

Happy New Year Crafters. I wish you all a very crafty 2012 with loads of successes with and without your sewing machine ;) ...

My first post of 2012 is a wee tribute. This past few months saw the beginning of a new chapter in our lives. My son Cullen started school. This was an incredibly exciting for both Cullen and I. I was very lucky to be working regularly in his classroom so I was gifted something many other mums are not...the opportunity to see him in his new environment. It was a wonderful way for me to transition from being a kindy mum to the mother of a big school boy. It was also a sad time too.... we were leaving Kindergarten. A place that our family had enjoyed each day for the past year. Making friends, exploring new activities and getting to know the wonderful teaching team. One member of this team I would like to draw special mention too.

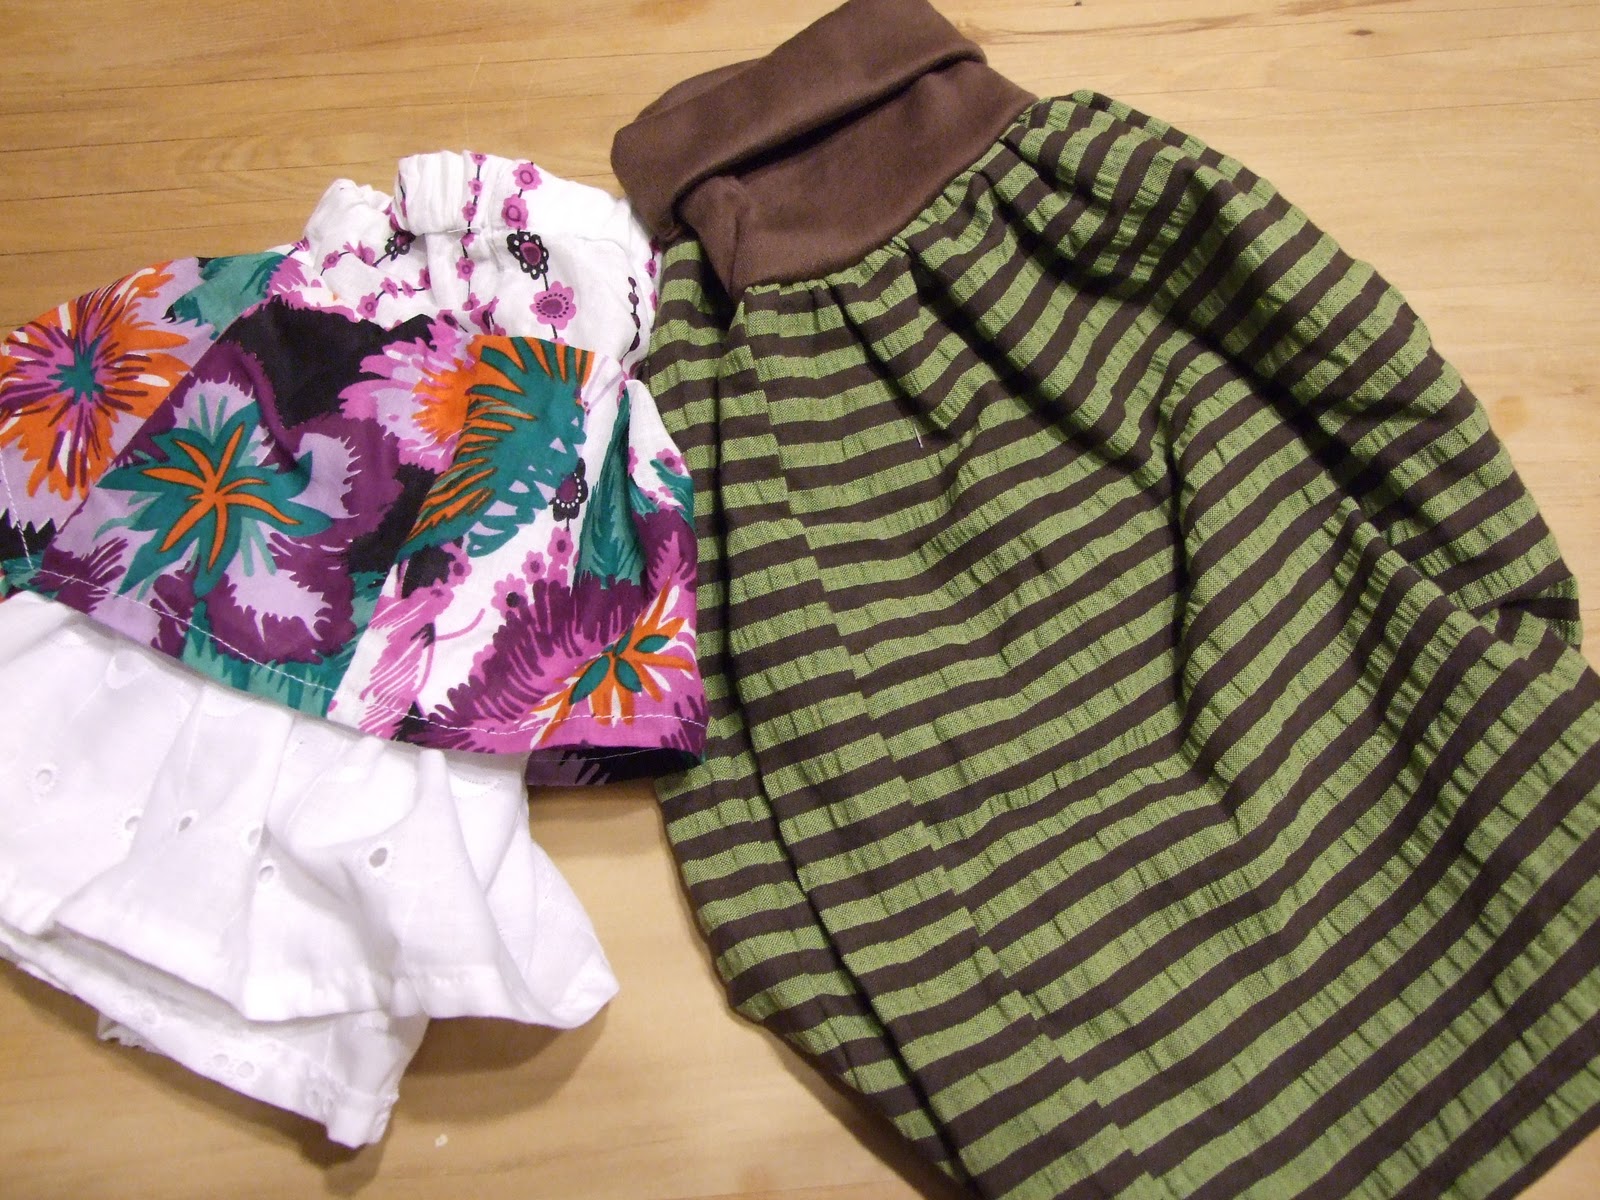
Lucy had been Cullen's main teacher. She spent hours and hours working on his profile book, watching him develop, helping him through many many challenges, sharing discoveries with him and praising and encouraging him. Lucy also spend many a moments chatting with me. We talked child development, Cullen development, family, kindergarten and sewing. Lucy is special. Lucy gave me a gift. A gift of fabric. She told me... "I have so much of it in my house. Never in my lifetime will I use it all up. I'd like to give some to you. I'll drop it off." So... one day Lucy arrived at my house laden with fabric. Metres and metres of it. Tartan, Corduroy, demin, cottons, satins, knits, loads! I have made many many things using her fabric. I have given some to other crafters too. Then just before Christmas, Lucy visited again. With more fabric! And these are what I made this time.
I have made a second pair of the  Clever Charlotte shorts for Macie and Cullen has another pair of long shorts. This time I added pockets to Cullen's by taking a pair off an old pair of jeans.... I quite like the look... And to add a bit extra to Macie's I cut the waist band, tabs and cuffs so the stripes went horizontal in contrast to the main panels of the shorts. ( At least Daddy thought they looked cool and not like PJ pants like the last pair... honeslty not much taste there!!!). So Macie and Cullen are completely stoked with 'matching' shorts.

And Lucy.... a big big thank you to you for all of your generousity both of your time and committment to Cullen's kindergarten education and also to me for your wonderful gift of fabric. We miss seeing you each morning. Macie and I love to come and say hello when we are passing Kindy. We have called these shorts Lucy shorts in your honour!!! (hehe). We look forward to much later in 2012 when number two comes to Kindy.

Wishing you all a pretty neat 2012 A x

Tuesday 27 December 2011

A Few Chrissy Pressies from me too

Phew, Christmas over for another year. Kind of feel bitter sweet about it really. It is such a massive build up, loads of time spent crafting gifts for loved ones, plenty of excitement around the fat dude in red, doses of anticipation from the kiddies. All good fun. My sewing machine in looking forward to a well earned service in the next couple of weeks but I am a little reluctant to give it up...even for a week! The poor ole thing was running red hot the week and a half leading up to Christmas eve starting and completing projects. Like Melissa, I vow to start earlier next year, unlike Melissa, I left all of mine right til the last minute.. nothing like a bit of pressure aye?!

Here are a few things I created for my family..
Baby bunting for Phoenix featuring gorgeous Dinosaur fabric


Funky long shorts for Cullen using Michael Millers Groovy Guitar fabric. I adapted a Burda pattern for these. Have since made a 2nd pair which I added a pair of pockets from some old jeans onto the backside.

A Darth Vadar cape for my gorgeous nephew... Xmas bunting visable there in the background too.

A really really easy little wallet - great for gift cards! Available here... or from Thimbles I believe.
Macie got these wicked shorts on Boxing Day (a great day to sew!) I picked up the fabric from Thimbles and Threads for only $12 a metre. I love them. The pattern is from Clever Charlotte.

I am halfway through another pair for her. These ones have been worn twice already. Uber cute!

I also managed to make several little pairs of dolls nappies with matching elastic wasted skirts for Macie's little friend's, a handful of bibs for the babies in my world, a wicked fabric bowl (pics and tutorial to come), several triangle purses (like Melissa's ones already blogged) which held bubble mixture for the kiddies. My niece was the happy recipient of a shockingly pink journal cover and matching triangle purse that I made long enough to fit a packet of gel pens.

Christmas done for 2011. Its wonderful to see faces when they open a handcrafted gift isn't it.?.

Merry Christmas to all of our followers. Happy New Year and happy sewing for 2012. A xx

Monday 26 December 2011

My handmade Christmas presents for 2011


Reversible merino beanie - tutorial to come

Kobo cover, adapted from The Cottage Home


Reversible Bucket Hat from Betz White

This was made from my husbands old pillow case from childhood - pretty neat eh?


Hanging organiser from Make it or Love it

Out of all these projects, I never EVER want to make this again!!

 Merino handwarmers from Pretty Neat eh!

 These coin purses are great for using up fabric from your stash, I put Hershey's Kisses in them


A pirate tie tshirt from Pretty Neat eh

A couple of skirts - A Yoga skirt tutorial from Sew Mama Sew  and a flirty skirt


These oh so cute utensil stockings from Craftiness is not Optional


Another idea from Make it Love It - a plastic bag holder

Felt circle headbands from Made it on Monday

A crayon roll - there's millions of these tutorials on the web but yell out if you want one


And last but not least, a door stop

Whew, can you see why I have been a bit stressed lately?  And amongst this I have still sewn dresses for Thea, and birthday presents for friends, and attended sewing classes and made various other things.  But it's all worth it and I can only hope those that receive on of these gifts appreciate all the work that went into it!

Till next time, Melissa

Friday 16 December 2011

Stocking's are a-ready Santa

As each wee family member arrives, it is essential that they have a stocking to hang before the big day. Our wee Phoenix is no exception. My sister Gem phoned a week or so ago and shared Phoenix's message. "Come on Auntie Am, get your skates on and please make me a stocking to hang up this year.... I'm expecting a big haul of pressies". Well, who could refuse such a cute wee 5mth old...

So Mr P, here you are!
Its pretty easy to whip one of these babies up. I traced around one of our stockings I already had, adding a 1/4 inch seam allowance as I went. I cut out 2 outside pieces and two inside pieces.


For the two outside pieces, I ironed them onto fusible fleece (available at craft stores) and ran a few quilting lines across them to anchor the fleece nicely.

Then I made the handle out of the inside fabric. I cut a length 2 1/2 inches wide and about 7-8 inches long. Folded it in half and pressed, then folded the long edges in towards middle about 1/4 inch and pressed again. I top stitched down each long edge.

Now you just sew the two outside fabrics together and the two inside fabrics together leaving the top of the stocking open. Leave a 4 inch gap in the bottom of the inner stocking so that you turn it all in the right way after sewing the two stockings together.

Attach your handle to the 'back' seam of the outside stocking.

Turn the outside of the stocking right side out and place it inside the inner, so that right sides are facing. Line up the side seams and sew around the top.
Once you have completed the top seam, you can turn the stocking right side out and stuff the lining back inside. Its nice to press the top with a small amount of the inside fabric showing. Then run a 1/4 inch top stitch around the top to finish your stocking. Sew the turning hole in your lining closed with an edge stitch.

Little P would probably like a play mate one day ... so I have added his initial to his stocking just to avoid any confusion for Father Christmas in the future ;)


Merry Christmas Little Phoenix. Love Auntie Am

Saturday 3 December 2011

Oh (pretend) Chrismas Tree

I LOVE Christmas.  Every year when I open up the box of Christmas decorations it's like opening presents or something, I just adore unwrapping each decoration and admiring it for all its beauty.  My mum started a tradition when I was younger that I have carried on with my kids - we give a decoration each year.  My hope is that when the kids have their own homes, I can turn up one Christmas with a box full of their decorations since they were born...awesome eh.

Anyway, I enjoy decorating the house not just one tree and I have stolen this idea from my mum.


So, what does a spiral bean grower thingy and tulle have to do with Christmas?


 They can make a pretend Christmas tree of course!


I purchased the black, metal spiral thing from The Warehouse for $20 (I have seen cane ones too, that would be cool) and then two metres of black tulle from Spotlight for under $15.  I literally stuffed the tulle up into the cone and then hung decorations from it.


It doesn't have any pokey out bits so you need decorations that can clip or have a long enough string to tie.  I would like to purchase some clip decorations which I will do in the sales after Christmas.

So there you go, it looks effective and if you don't want a tree why don't you try this instead?

Till next time, Melissa